Showing posts with label About Simple Recipes. Show all posts

Sunday, July 31, 2016

Making Onigirazu (おにぎらず Rice Sandwiches) with Children

DaDi and MaMi's signature home cooked dishes are steamed minced pork, steamed broccoli and omelette! Well, the children are not too excited about the meal since they have these dishes so often. So, in order to make the meal more exciting, and without flipping the kitchen upside down, we made Onigirazu (rice sandwiches) with the children!

What is Origirazu (おにぎらず)? It is a variation of rice ball wrapped with nori (seaweed sheet) and is in rectangular or square shape.


Ours is the greedy version - we stuffed too much ingredients!


Ingredients:
Rice
Seaweed sheet
Anything that you wish e.g. minced pork, egg, cucumber, ham, chicken fillet, cheese


Instruction:
  1. Place a seaweed sheet on a cling wrap.
  2. Place a layer of rice and flatten this layer with a spoon.
  3. Place other ingredients.
  4. Place another layer of rice on top, and flatter this layer with a spoon.
  5. Fold the four corners of the seaweed sheet towards the centre of rice, wrap tightly with cling wrap to make a rectangular or square shape.
  6. Cut it into half.


If your children are very young, take note that it may be challenging for them to bite and swallow the seaweed. So you may considering making Temari Sushi with them - see our recipe for Temari Sushi!


Thank you for visiting PeiPei.HaoHao. If you enjoy reading this post, do stay connected with us on Facebook!

Tuesday, January 5, 2016

One Pot Meal - Rice Cooker Chicken Wings Rice (Only 3 Steps!)

The children love chicken rice, and recently I tried out cooking it with a short-cut method, only 3 steps!


Ingredients:
8-9 mid-joint chicken wings
1 tablespoon oyster sauce
1 teaspoon light soy sauce
2 cups (rice cooker cup) rice
2 large carrots (optional)

Instruction:
  1. Marinate the chicken wings with oyster sauce and light soy sauce, put into the refrigerator for 2 hours. 
  2. Wash rice, put the rice into the rice cooker pot, add water to the marking of the pot. Put in the chicken wings. 
  3. Switch on the rice cooker, cook rice as per normal.
Optional: Slice the carrots, and add into the rice cooker pot together with the rice and chicken wings.


The rice at the bottom of the pot turned out to be crispy like clay pot rice!


Thank you for visiting PeiPei.HaoHao. If you enjoy reading this post, do stay connected with us on Facebook!

Monday, December 28, 2015

Luo Han Guo Chrysanthemum Tea (羅漢果菊花茶) Recipe

I am not sure why we tend to have soar throat quite easily, so we prepare chrysanthemum tea to "cool" ourselves. Other than just using dried chrysanthemum flowers alone, we can also add honeysuckle flowers (金銀花) or luo han guo (羅漢果). We shared our recipe of Honeysuckle Flowers & Chrysanthemum Tea before, and this time, we are sharing our recipe of Luo Han Guo & Chrysanthemum Tea.


Ingredients:
2 luo han guo (羅漢果)
70 grams dried chrysanthemum flowers
2.5 litres water


Instruction:
  1. Boil the water in a big pot.
  2. Rinse dried chrysanthemum flowers.
  3. Rinse the shell of luo han guo. Gently crack the shell of luo han guo using the handle of the knife. Open the fruit.
  4. Put the dried chrysanthemum flowers and luo han guo into the boiling water, boil on high heat for 5 minutes, then simmer for 15-20 minutes.
  5. Sieve the dried chrysanthemum flowers and luo han guo, serve the tea warm or chilled

Thank you for visiting PeiPei.HaoHao. If you enjoy reading this post, do stay connected with us on Facebook!

Thursday, November 19, 2015

Oven Baked Prawn Paste (Har Cheong) Chicken Wings / Boneless Legs

Deep-frying food has never happened in our house. It is simply because, I am scared of hot oil! So the alternative method to prepare crispy food is to bake in oven!

Actually we had been making oven baked prawn paste chicken wings / legs many times, now then I document the recipe after many trial and error in the process.


Ingredients:
18 mid-joint chicken wings / 4 boneless legs 
1 tablespoon prawn paste
1 tablespoon oyster sauce
1 teaspoon sugar
Vegetable oil (we used sunflower oil)
Flour

Instruction:
  1. Marinate the chicken wings with prawn paste, oyster sauce and sugar, put into the refrigerator for 2 hours.
  2. 20 minutes before baking, use kitchen towel to dry the chicken wings, coat with flour, tap the chicken wings lightly to remove excess flour. Put back to refrigerator.
  3. Coat the baking tray with a thin layer of vegetable oil.
  4. Preheat the oven to 200 degrees Celsius.
  5. Bake for 15 minutes for chicken wings / 25 minutes for chicken boneless legs. Increase the temperature to 220 degrees Celsius and bake for another 5 minutes.

We also tried to make oven baked prawn paste chicken boneless legs without adding flour, it turns out to be very delicious too!


Thank you for visiting PeiPei.HaoHao. If you enjoy reading this post, do stay connected with us on Facebook!

Wednesday, June 3, 2015

Homemade Rösti Recipe

The egg waffle maker has been placed into the "cold storage" (being ignored) for a while. We had made Hong Kong egglets and Takoyaki, what else can this maker be used for? Recently, I read that Rösti can be made using waffle maker - the one that produces square patterns, so I thought it should work the same with our egg waffle maker.

We bought this tool to grate the potatoes. The loving children reminded me not to get my fingers cut!


It was a bit of trial and error to get the right timing with the maker.


Does our Rösti look cute?


Honestly, it was quite challenging to clean up the waffle maker after that, because I didn't dare to wash it under the tap! So in the next round of Rösti-making, I used my almost-forgotten Happycall double sided pan. We added some cheese and it tasted delicious!


Ingredients (1 serving):
2 big potatoes

Instruction:
  1. Grate the potatoes, and place the shredded potatoes in a bowl of water.
  2. Squeeze the shredded potatoes dry before placing into the egg waffle maker / frying pan.
  3. Cook until the potatoes turn brown. For our egg waffle maker, the time taken was about 8 minutes.

Thank you for visiting PeiPei.HaoHao. If you enjoy reading this post, do stay connected with us on Facebook!

Thursday, May 7, 2015

Marshmallow Brick Toast Recipe

When we visited Taiwan N years ago, we tried a snack called 棺材板 - it literally means "coffin"! But it is also said that it means 升官發財 (get promotion and prosperous).  It is actually a deep fried toast with a hole in the centre, which is filled is ingredients like chicken meat, onion, carrot. 

Recently, I heard that similar concept is applied to dessert - honey, fruits and ice-cream are used instead. Well, it looks quite easy to prepare. However, the children have been coughing, so we had to give ice-cream a miss. We created Marshmallow Brick Toast, which is super easy to prepare!


Ingredients:
4 slices bread
9 pieces marshmallow
Butter


Insruction:
  1. Preheat oven at 170 degrees Celsius.
  2. Use scissors to cut a square from each of 3 slices of bread. Then cut the square into smaller pieces. I personally find that it is easier to scissors as compared to knife.
  3. Spread butter on the bread.
  4. Bake the bread for 5 minutes.
  5. Assemble the bread - place the whole piece of bread at the bottom, then stack up the other 3 pieces with a hole in the centre, place the small pieces in the hole, then arrange the marshmallow on top.
  6. Place the brick toast in the oven, watch carefully - take out the toast once the marshmallow starts to melt!


The marshmallows are delicious - the outer layer is crispy, while the inner part is melted. That reminds me of the good old days when we had barbecue, many of us would have some grilled marshmallows to complete the meal!

Warning - it was quite messy when the children ate the marshmallows!


Thank you for visiting PeiPei.HaoHao. If you enjoy reading this post, do stay connected with us on Facebook!

Tuesday, April 28, 2015

One Pot Meal - Whole Tomato Rice + Steamed Minced Pork

The children are not fans of tomato. Some time ago, there was a craze in whole tomato rice on the internet, I decided to give it a try, hopefully it would change their perception on tomato. 


Initially, I thought of mixing the minced pork together with the rice. However, I was afraid that the minced pork would turn out to be too dry when it was cooked for long time, so I steamed the minced pork in the a plate and placed on the rice when the rice was almost cooked.


Tomato rice recipe adapted from Ochikeron

Ingredients for Tomato Rice:
2 cups rice (measured using the cup of rice cooker)
1 big tomato
2 carrots
1 sweet corn (alternatively, use ready packed corn kernels)

Ingredients for Steamed Minced Pork:
250 grams minced pork
1 tablespoon oyster sauce

Instruction:
  1. Marinate the minced pork with oyster sauce. Place in the refrigerator for 2 hours.
  2. Rinse rice and place in the rice cooker. The ratio of rice to water is about 1: 1.2.
  3. Remove the stem of the tomato. Cut a cross at the bottom of the tomato.
  4. Cut the carrots into slices and cut out the kernels of the sweet corn, add into the rice cooker.
  5. Switch on the rice cooker.
  6. At the last 12 minutes of the cooking time of the rice, place the minced pork into a plate, which is then placed in the rice cooker. (Note: Different rice cookers work differently, mine would indicate the last 12 minutes)
  7. Remove the minced pork from the rice cooker.
  8. Mash the tomato and stir the ingredients with rice.


When the rice was ready, I didn't mash the tomato immediately. I took out some rice first, just in case the children didn't like the tomato. And I had done the right thing!

Nevertheless, I enjoy tomato rice very much, and am thinking of trying out other variations for my own consumption!

Thank you for visiting PeiPei.HaoHao. If you enjoy reading this post, do stay connected with us on Facebook!

Thursday, April 16, 2015

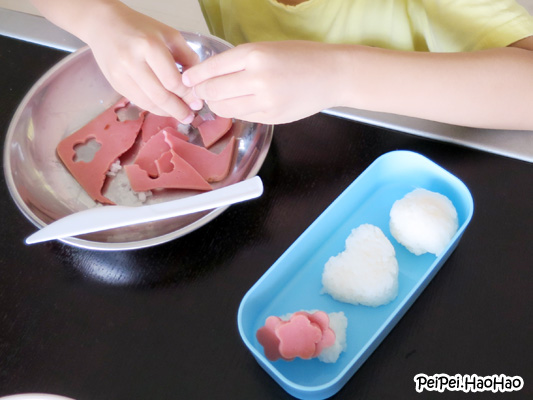
Making Temari Sushi with Children

We have been cooking with flour to make pancakes, pizza, breadcookies and Hong Kong egglets. So I thought we shall cook something else together over the weekend. As we watched the mouth-watering sushi on Japan Hours (Channel NewsAsia) on Saturday, we decided to make some sushi on the next day!

We made temari sushi (temarizushi 手まり寿司). Oh, what is temari sushi?  Temari sushi are sushi balls that resemble temari, which are Japanese embroidered balls.


Making sushi helps children to develop fine motor skills as they mold the rice balls, cut the ingredients, and place the ingredients on to the small rice balls. Making temari sushi allows the children to unleash their creativity.


The children's creations

Ingredients:
2 cups rice
2 eggs
2 Japanese cucumbers
4 slices ham

Instruction:
  1. Cook the rice with slightly more water than required (look at the marking in the rice cooker). This makes the rice slightly sticky.
  2. Pan fry the ham.
  3. Beat the eggs and pan fry.
  4. Peel the skin of the cucumbers and remove the seeds. Peel using the peeler, or cut into strips, or cut into slices.
  5. When the rice is ready, put into a big bowl to cool.
  6. Place 2 tablespoons rice on cling wrap, twist up the ends of the wrap tightly, use your palm to roll the rice into a round ball.
  7. Cut ham and eggs using knife or cookie cutters, decorate the rice balls.


Ideas:
  • Use vegetable peeler to slice cucumber, wrap the strips of cucumber around the rice ball (refer to the photo above, the rice ball in the middle).
  • Use strips of thin egg omelet to wrap around the rice balls.

Thank you for visiting PeiPei.HaoHao. If you enjoy reading this post, do stay connected with us on Facebook!

Sunday, March 8, 2015

Making Takoyaki using Egg Waffle Maker

We made our homemade Hong Kong egglets (雞蛋仔) with our egg waffle maker. You may wonder, what else can be made using this maker?

Our suggestion - making Takoyaki! 

The children are not very keen in octopus, so we used ham and cheese instead. We also omitted the mayonnaise and takoyaki sauce as they are beyond my budget.


Our so-called takoyaki did not look like the usual takoyaki - ours was one whole piece of balls joining together! Nevertheless, it was delicious!

Adapted from Little Japanese Mama

Ingredients:

1 cup plain flour
1 1/2 tablespoon corn flour
2 eggs
2 cups water
1 teaspoon chicken stock
3 slices ham
2 slices cheese
Dried bonito flakes

Instruction:
  1. Sift flour into a big mixing bowl. Add corn flour.
  2. Add eggs, chicken stock and water. Mix well.
  3. Pour the batter into a big measuring cup so that it is easier to pour into the egg waffle maker. Place in the refrigerator for 1 hour.
  4. Cut the ham and cheese into small pieces, add to the batter.
  5. Pre-heat the egg waffle maker. Coat the maker with a thin layer of vegetable oil.
  6. Pour the batter evenly into the lower plate of the egg waffle maker. Close the cover, wait for 10 seconds, turn the maker.
  7. Cook for about 3 minutes for the first piece. Subsequently, the cooking time can be reduced to about 2.5 minutes.
  8. Place dried bonito flakes on top. 

Thank you for visiting PeiPei.HaoHao. If you enjoy reading this post, do stay connected with us on Facebook!

Sunday, March 1, 2015

Homemade Hong Kong Egglets / Egg Waffle (雞蛋仔) Recipe

Hong Kong egglets (egg waffle) 雞蛋仔 is one of my favourite childhood snacks.


When I visited Hong Kong 2 years ago, I bought a 雞蛋仔 pan (HKD140) to make the delicious snack at home, so that Pei Pei and Hao Hao can share the joy of my childhood.


I was so excited to make egglets at home! However, after I tried once, the metal pan was sent to the "cold storage". The reason? As I was not skillful and was not well-prepared, when I flipped the pan, the batter flew all over the place, and I took long long time to clean up the stove.

Recently, I heard about an electric egg waffle maker and bought it at S$39 without much hesitation. Oh, I was so thrilled to make egglets without creating a big mess!


The children helped in preparing the batter, and I would be the chef operator using the maker, as it is too dangerous for the children to handle the hot equipment.

The children enjoyed eating so much that I only managed to "steal" a few to taste.


Recipe adapted from I Love Cake

Ingredients:
140 g all-purpose flour
7.5 g baking powder
28 g corn flour (or tapioca starch)
2 eggs
28 g vegetable oil
140 g sugar
28 g milk (or evaporated milk)
140 g water

Instruction:
  1. In the first bowl, sift the all-purpose flour, baking powder and corn flour.
  2. In the second bowl, add eggs and sugar, mix well. Add milk and water, mix until foams are observed.
  3. Add the egg mixture into the flour mixture, add a small portion at a time. Mix well.
  4. Add vegetable oil. Mix well.
  5. Pour the batter into a big measuring cup so that it is easier to pour into the egg waffle maker. Place in the refrigerator for 1 hour.
  6. Pre-heat the egg waffle maker. Coat the maker with a thin layer of vegetable oil. 
  7. Pour the batter evenly into the lower plate of the egg waffle maker. Close the cover, wait for 10 seconds, turn the maker.
  8. Cook for about 3 minutes for the first piece of egglets. Subsequently, the cooking time can be reduced to about 2.5 minutes.


Thank you for visiting PeiPei.HaoHao. If you enjoy reading this post, do stay connected with us on Facebook!

Saturday, January 10, 2015

Big Hero 6 Baymax Bento - Baymax Onigiri

We were treated to watch Big Hero 6 last November, the children like Baymax, which gave me an idea to make a simple bento dinner for them.


Making ongiri (rice balls) does not require special tool, you just need to place the rice in a piece of cling wrap to make the shape required. Take note that when you cook the rice, add slightly more water to make the rice sticky, so it can be made into rice ball easily.

For the body of Baymax, there are many ingredients that you can use as fillings, for example, minced pork / chicken, salmon, bonito flakes and egg.

Pardon the funny decorations on the right, I wanted to make the xiao bai cai umbrella, but Baymax that I made was too big to stand under it!


Thank you for visiting PeiPei.HaoHao. If you enjoy reading this post, do stay connected with us on Facebook!

Tuesday, December 9, 2014

Green Tea Panna Cotta Recipe

Like me, the children have a sweet tooth, so I have been learning how to make homemade desserts for occasional treats for them. Yes, occasionally, since I don't want their weight (and mine) to grow exponentially. 

One of the easiest recipes for desserts, in my opinion, would be panna cotta. What is panna cotta? It is originated in Italy, and it means "cooked cream" literally. 


Ingredients:
200 ml milk
200 ml heavy cream
50 grams sugar
0.5 to 1 tablespoon green tea powder based on your preference
3 teaspoons gelatin powder


Instruction:
  1. Heat milk, heavy cream and sugar in a pot over low heat (do not let it boil).
  2. Sieve green tea powder into the pot.
  3. Add gelatin powder.
  4. Pour the mixture into containers, allow it to cool before putting into the refrigerator. 

For this amount of ingredients, we made 4 servings using chawamushi cups and glass bottles, each of us had 1 serving. Hope this would not make us put on too much weight!


Thank you for visiting PeiPei.HaoHao. If you enjoy reading this post, do stay connected with us on Facebook!

Tuesday, November 25, 2014

Mango Yoghurt Ogura Cake Recipe (相思蛋糕)

In the past, I didn't like to eat yoghurt. Somehow my taste buds changed over the years, now I enjoy eating yoghurt, and my children love it too.

Recently I learnt that yoghurt can be used in baking cakes! Oh, I know it is nothing new to the bakers, but it is a new discovery to me! It is also my first attempt in using steam baking method. The cake that I baked does not look very pretty, but it is soft, moist, and not too sweet.


Adapted from Food@Home Sweet Home

Ingredients:
Egg yolk mixture
3 egg yolks
2 tablespoons Canola oil
1 cup Meiji mango yoghurt
30 grams flour
a pitch of salt

Egg white mixture
3 egg whites
35 grams sugar
1/8 teaspoons baking powder (we didn't have cream of tartar on hand)


Instruction:
  1. Line baking paper on the pan.
  2. Prepare egg yolk mixture - beat egg yolks until foamy, mix well with Canola oil, and add in mango yoghurt, whisk for a few minutes. Pour these into a mixing bowl with salt and flour, mix until smooth.
  3. Prepare egg white mixture - beat egg white in a clean bowl until slightly thick, add sugar and baking powder. Whisk until firm peak (See The Kitchn's illustration).
  4. Pour hot water into the baking tray to about 1 cm in depth, put it at the lowest level in the oven, preheat the oven at 170 degrees Celsius.
  5. Fold the egg white mixture into the egg yolk mixture.
  6. Pour the mixture into the pan, tap the pan on the table a few times to removed trapped bubbles.
  7. Put the pan on a baking rack, placed at a level above the tray of hot water. Bake for 40 minutes.

I used a 6-inch round pan, the cake turned out rather flat. I would increase the amount of ingredients or use my cupcakes cups next time.


Thank you for visiting PeiPei.HaoHao. If you enjoy reading this post, do stay connected with us on Facebook!

Tuesday, November 11, 2014

Homemade Thick and Creamy Mushroom Soup Recipe

Mushroom soup is one of my favourite western soups. I love mushroom soup that is thick and creamy. However, some restaurants offer mushroom soup that is so dilute that it spoils my appetite. Perhaps making this at home would avoid many disappointments.


Ingredients:
250 grams mushrooms
1 tablespoon butter
250 ml chicken broth
250 ml hot water
100 ml heavy cream


Instruction:

  1. Slice the mushrooms.
  2. Heat butter in a pot, add mushroom to cook for a few minutes. (We omitted garlic which is used in many recipes)
  3. Add chicken broth and hot water into the pot, simmer for 15 minutes.
  4. Choose a few slices of mushroom that look "presentable", for decorating later.
  5. Pour the mixture into blender.
  6. Pout the mixture back to the pot, add heavy cream, cook for a few minutes.
  7. Serve the soup, put a few slices of mushrooms from Step 4 to decorate.

Thank you for visiting PeiPei.HaoHao. If you enjoy reading this post, do stay connected with us on Facebook!

Monday, November 3, 2014

Sensory Play - Making Cookies Using Rubbing-in Method

The children love playing with dough recently - bread dough and pizza dough. It is interesting that the longer we knead the bread or pizza dough, the smoother and less sticky it becomes. 

Recently, the children had their hands on another type of dough - cookie dough. As the little hands were rubbing the butter into the flour, the mixture became something like breadcrumb. 

Before we started making cookies, I showed them a short video on rubbing-in method in making cookies. The chef in the video dropped the mixture from a distance above the mixing bowl to introduce air into the mixture, and the children followed. 

That reminded me of the "Lo Hei" during Chinese New Year. And the mess after that.


Instead of using spoons or cookie cutters, we used this whipped cream dispenser, which was bought from Daiso long time ago. I think I have kept it so well that I almost forget that I have bought it! 


It was a good practice to develop fine motor skill, as the children had to push the piston with one hand, and to use another hand to control the movement to make the desired pattern. 


Well, the cookies may not look very pretty, but they are yummy!


Ingredients:
100 grams plain flour
50 grams unsalted butter
50 grams sugar
1 beaten egg


Instruction:
  1. Sieve the flour into a mixing bowl.
  2. Cut the butter into small cubes, rub with flour with fingertips to make it look like breadcrumb.
  3. Add sugar and beaten egg.
  4. Put the mixture into refrigerator for 30 minutes.
  5. Put some mixture into the whipped cream dispenser (we bought from Daiso) or piping bag to make the cookies. Preheat the oven at 180 degree Celsius.
  6. Bake the cookies for 20 minutes.

Tips:

Make the cookies of about same size. We made some small and some giant cookies, under the same oven temperature and timing, the small ones turned out to be crispy, while the big one turned out to be soft inside.


Thank you for visiting PeiPei.HaoHao. If you enjoy reading this post, do stay connected with us on Facebook!

Sunday, October 26, 2014

Watercress Honey Drink Recipe (西洋菜蜜)

Watercress honey drink (西洋菜蜜) is one of my favourite beverages, because it is sweet and refreshing. I ever bought the concentrated watercress honey syrup from supermarket in Hong Kong before, however, I cannot find this in Singapore. Yes, there are some restaurants in Singapore that offer this beverage, but at S$2+ per cup, I can only afford to order one cup at one time.

Finally, I manage to make watercress honey drink at home! It is actually very easy, and the children love it too!


Ingredients:
200 grams watercress 
1 honey date (蜜棗)
1 litre water
Honey / honey rock sugar (石蜂糖) to taste


Instruction:
  1. Wash watercress, cut into half. Wash honey date.
  2. Put watercress and honey date into boiling water, simmer for 45 minutes.
  3. Add honey or honey rock sugar according to your preference, sieve and then serve either warm or chilled.

What is your favourite beverage?


Thank you for visiting PeiPei.HaoHao. If you enjoy reading this post, do stay connected with us on Facebook!

Sunday, October 19, 2014

Easy Breakfast Recipe - Baked Egg and Ham Cup

Being a novice cook means my family does not get to enjoy a variety of homemade food. Or to be honest, I should say, my family does not get to enjoy tasty homemade food. 

Ever since I bought an oven some time ago, I make it work very hard as I am conducting more and more cooking experiments. After all, one thing I love about using oven is that the cleaning is much easier comparing to using frying pan!

Let me share with you a super easy breakfast recipe - baked egg and ham cup. Of course, it is not limited to be served at breakfast time, it can be great for tea time too!


Ingredients (for 1 serving):
  • 1 Egg
  • 1 slice of bread
  • 1 piece of ham
  • Some shredded cheese (the amount and type is based on your preference, we used Cheddar cheese)

Instruction:
  1. Preheat the oven at 190 degrees Celcius.
  2. Roll the bread flat and lay it in a muffin tray or pie mold lined with cupcake liner (can slight grease with butter instead). 
  3. Place the ham on top of the bread.
  4. Crack an egg on to the ham.
  5. Sprinkle some cheese into the egg.
  6. Bake for 16 minutes for a runny egg, or 20 minutes to make the egg cooked.
Notes: Depending on the size of the muffin tray or pie mold, not all the egg white is needed as it may overflow.

Isn't this baked egg and ham cup super simple? Even children can make this!


Thank you for visiting PeiPei.HaoHao. If you enjoy reading this post, do stay connected with us on Facebook!

Tuesday, September 16, 2014

4-Ingredient Eggless Matcha (Green Tea) Ice-cream

The last time we made ice-cream at home was about a year ago - we made matcha (green tea) ice-cream for our ice-cream moon cakes.

This time, I try a new recipe that does not require eggs. The reason? I forgot to buy eggs!


Ingredients:

300 ml thickened cream
150 ml milk
0.3 cup sugar
2 tablespoons Matcha (green tea) powder (I bought mine from Phoon Huat)


Instruction:
  1. Warm the milk in a saucepan over low heat, do not boil it. Add Matcha powder and sugar into the warm milk. Stir until matcha powder and sugar are dissolved. Allow the mixture to cool.
  2. Whip the cream until it is thick and stiff.
  3. Fold the mixture from Step 1 into the whipped cream using a spoon or spatula. 
  4. Put the Matcha ice-cream into the freezer. Take it out for every 1 hour to mix well, this minimises the formation of crystals in the ice-cream and improves the texture. Repeat this step for 2 to 3 times.
  5. Freeze it for a few hours or overnight.
Thank you for visiting PeiPei.HaoHao. If you enjoy reading this post, do stay connected with us on Facebook!

Tuesday, August 26, 2014

Soy Milk + Milo Agar Agar Mooncake

If you have not realised, it is two more weeks to Mid-Autumn Festival. 

Last year, I made matcha (green tea) ice-cream mooncakes, this year I decided to try something new - Soy Milk + Milo Agar Agar Mooncake!


Ingredients:
500 ml soy milk
500 ml water
60g Milo powder
12g agar agar powder (we used 1 packet Rose brand)


Instruction:
  1. Boil water in one pot, add Milo powder when water is boiled, then with small fire, dissolve 6g (half packet) of agar agar powder.
  2. Warm soy milk in another pot with small fire, dissolve 6g (the other half packet) of agar agar powder.
  3. Add some Milo mixture into the jelly mould. When it is just solidified, add some Soy Milk mixture. Repeat until the whole mould is filled.

Tips:
  • Before I added the mixture into the mould, I used water to gauge how much mixture I should add for each layer. 
  • I placed the jelly mould on a tray of water to cool down the mixture faster.
  • When the previous layer is just solidified, check by placing a small spoon and touch gently. However, do not wait until the layer is completely solidified, the layers may not stick when you remove the agar agar from the mould.
  • To prevent the mixture in the pots from solidifying too fast, cover the pots with lids.

Happy Mid-Autumn Festival! 中秋節快樂!

Thank you for visiting PeiPei.HaoHao. If you enjoy reading this post, do stay connected with us on Facebook!

Wednesday, July 30, 2014

Milo Cupcakes

Since we bought the oven, I have been thinking of what we should bake next. Our first baking project basic cupcakes was quite successful, so this time, I thought of baking another variety of cupcakes - Milo cupcakes!


Ingredients (make 6 cupcakes):
100g flour (we used plain flour)
2 teaspoons baking powder
2 medium eggs
40g castor sugar 
80g butter
2 tablespoons condensed milk
100 ml milk
60g Milo powder (we used 2 sachets of instant Milo powder)


Instruction:
  1. Preheat oven to 180 degrees Celsius
  2. Melt the butter in a sauce pan over low fire. Add sugar, condensed milk, milk and Milo powder. Stir until the sugar and Milo powder are dissolved.
  3. Sift flour and baking powder in a mixing bowl
  4. Beat eggs with a high speed for 1 minute, followed by a slower speed until it turns fluffy
  5. Add the eggs to (2), followed by flour and baking powder
  6. Divide the batter into 8 cupcake cups. Fill to about 70% of the cup.
  7. Bake the cupcakes at 180 degrees Celsius for 20 minutes

Our Milo cupcakes did not look really nice, because I accidentally turned the temperature to 190 degrees Celsius for a while! I think the temperature was too high and caused the cupcakes to "smile" (crack)! Anyway, Hao Hao loved the Milo cupcakes so much that he ate 3 of them!

Perhaps I shall try making Milo cream to decorate the cupcakes next time!

Thank you for visiting PeiPei.HaoHao. If you enjoy reading this post, do stay connected with us on Facebook!